
A simple Cake Pop Recipe made In Cake Pop Maker. Tips, tricks & simple decorating ideas.
Finally Using The Cake Pop Maker Christmas Gift
So I had avoided the Cake Pop Maker for about eight months. Definitely not winning any mother of the year awards over here.
The Cake Pop Maker was one of my daughter’s Christmas gifts that I’m pretty sure I had absolutely nothing to do with.
Sure it’s a cute little gift and a cute little machine. But I had flashbacks of Easy Bake Oven flops…
Instructions, Tips & Tricks
So the most interesting lesson learned from this Cake Pop Creation Experience – my 8 year old daughter has far more patience than I do.
The most important lesson we learned is the Cake Pop Maker gets HOT! Be super careful if the kiddies are involved in this operation.
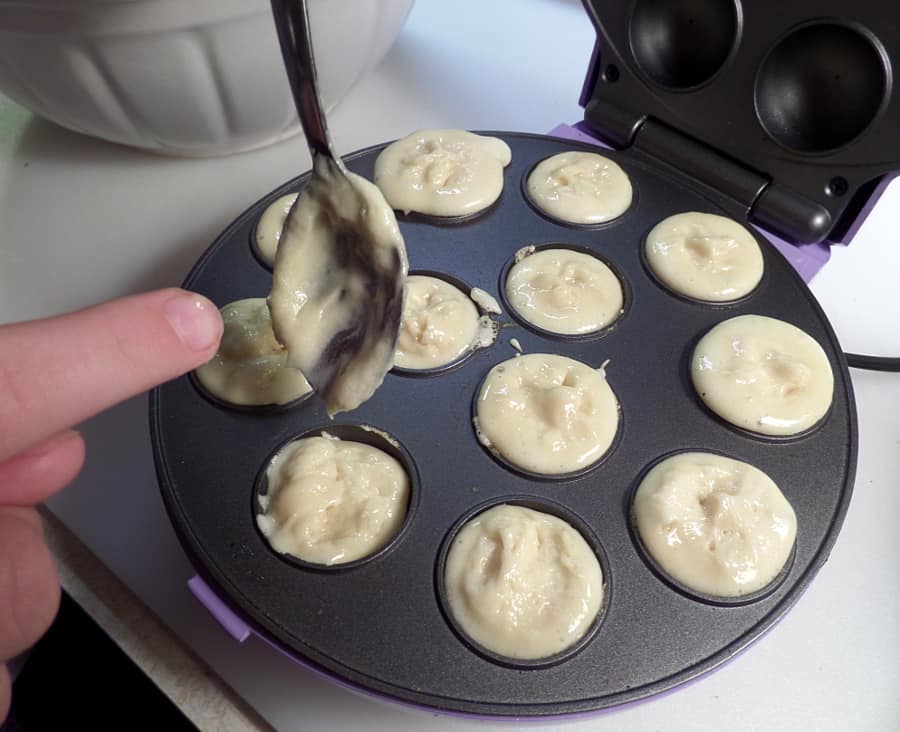
Of course we learned a few other lessons along the way. The amount of cake batter you fill in each reservoir is very important. The instructions call for a tablespoon, so that’s a good amount to try and start with.
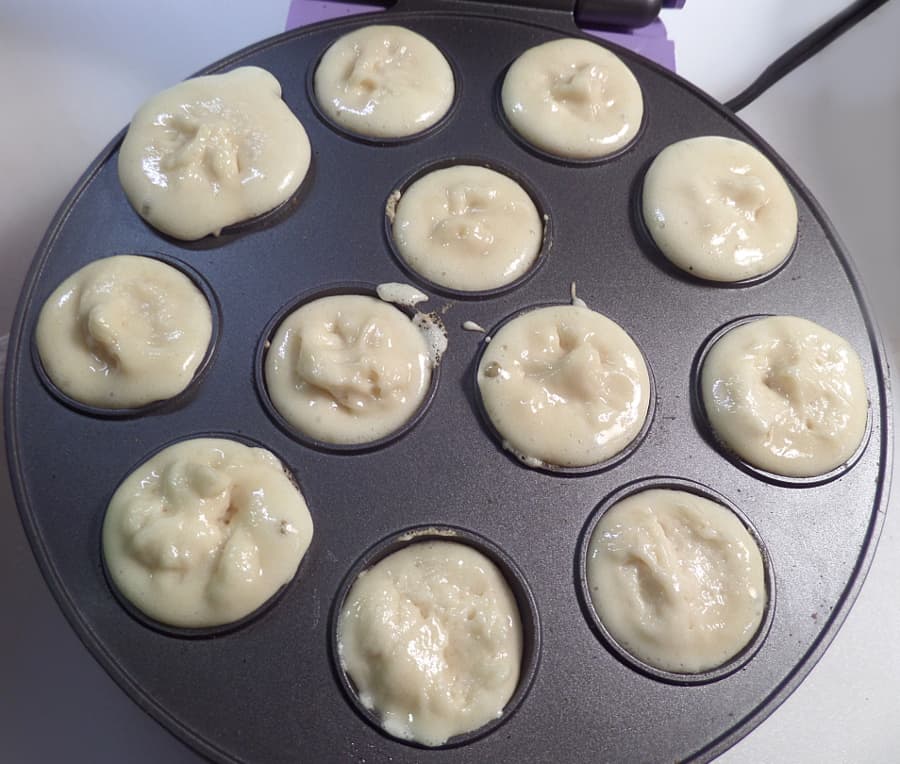
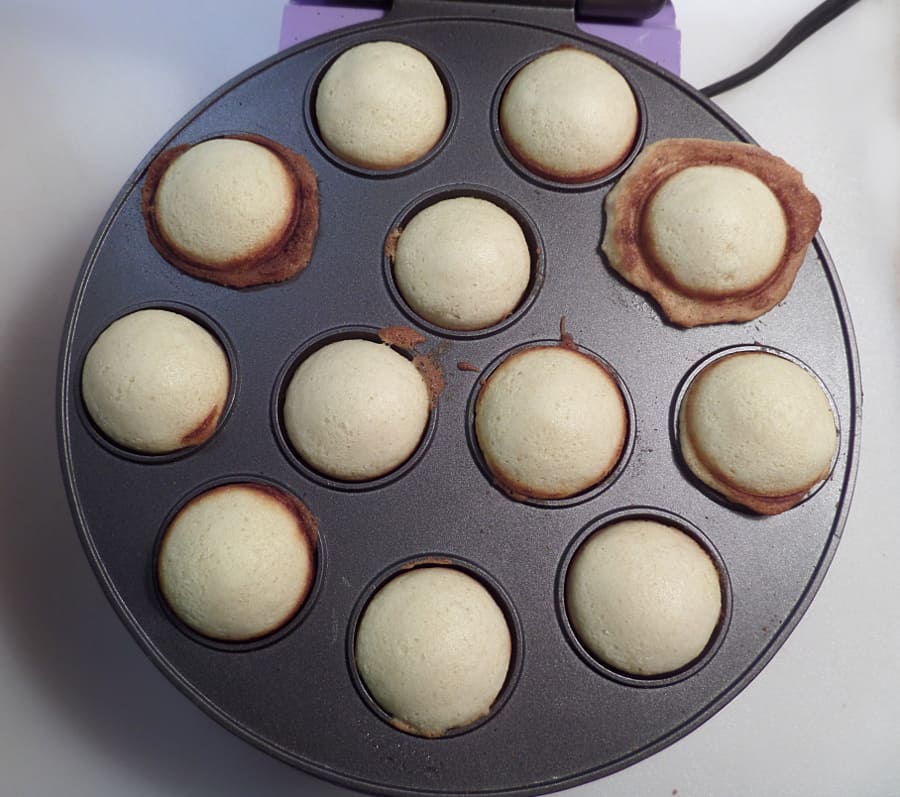
Too much batter and you have Saturn Cake Pops – not enough and you have flat pebble cake pops.
We tried various amounts of batter on our first round to see what amount worked best. After establishing that amount – we continued to over and under fill – cause that’s just how we do things. lol
A thick cake batter worked wonders for this – not too drippy or runny. I would suggest trying one of the simple cake recipes from the cake pop maker website on your first go with it.
The easiest method of filling the reservoirs for us was a kitchen teaspoon and scraping it in with our finger. A piping bag is suggested in the instructions, for some reason we skipped that. I could see a piping bag or a squeeze bottle simplifying the process.
Don’t mess around too much while filling – you want your cake pops evenly cooked.
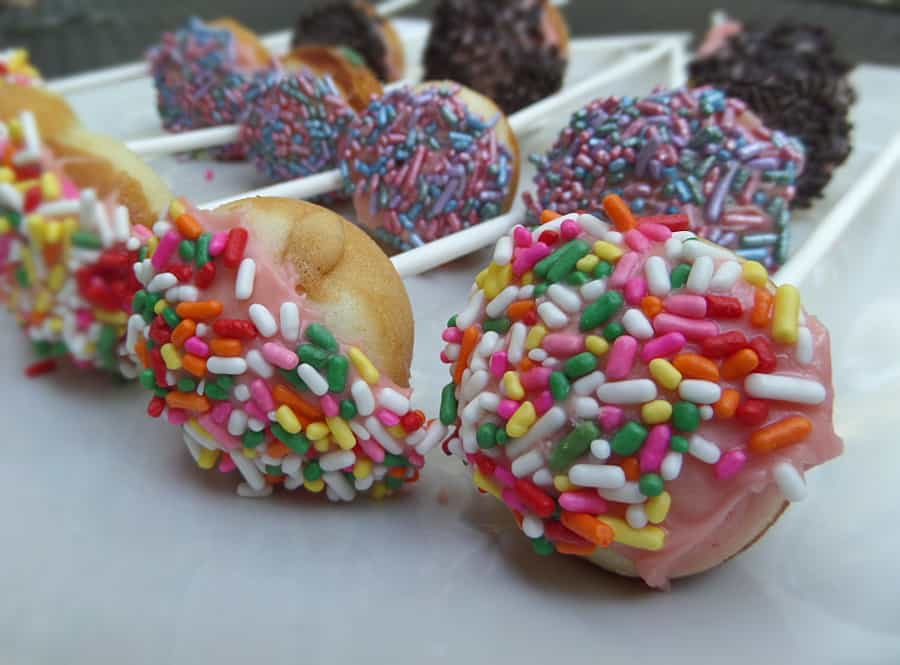
Decorating
For this batch we kept it simple.
I gave her sprinkles and icing and she went to town.

They certainly did look cute and I was impressed with how tasty they were.
We’ve made other batches with dipping chocolate. It’s actually an easier decorating process – but I prefer the cake pops with an icing or frosting.

Hope you enjoy!
Amanda ♥

Vanilla Cake Pops
Ingredients
- 1 1/2 cups all-purpose flour
- 1 teaspoon baking powder
- 1/4 teaspoon salt
- 1/2 cup butter softened
- 1 cup sugar
- 2 eggs
- 2 teaspoons vanilla
- 1/2 cup milk
Instructions
- Preheat cake pop machine. Lightly spray with cooking spray if necessary.
- Combine flour, baking powder and salt.
- In a (separate) large mixing bowl, beat together butter and sugar until creamy. Beat in eggs and vanilla.
- Add flour mixture to large mixing bowl – 1/4 of mix at a time. Mix, add in 1/4 of milk. Repeat until completely blended.
- Fill each cake pop reservoir with batter – approx 1 tablespoon each.
- Close lid – “bake” 4-5 minutes.
- Allow to cool before decorating.
- Makes about 4 dozen.
Hi there! Brilliant recipe! Would you happen to know if it’d work if I made ‘ savoury muffins’ in the cake pop machine?