

These Crab Rangoon Quesadilla are a quick & simple version of a Chinese restaurant favorite. Tortillas are far less finicky than wonton wrappers and pan fry up to crispy and buttery deliciousness. Crab Rangoon Quesadilla – All The Flavor & Crispiness Without The Fuss One of my guilty pleasures is a single, very specific Chinese…
Snacks
Cucumber Sushi
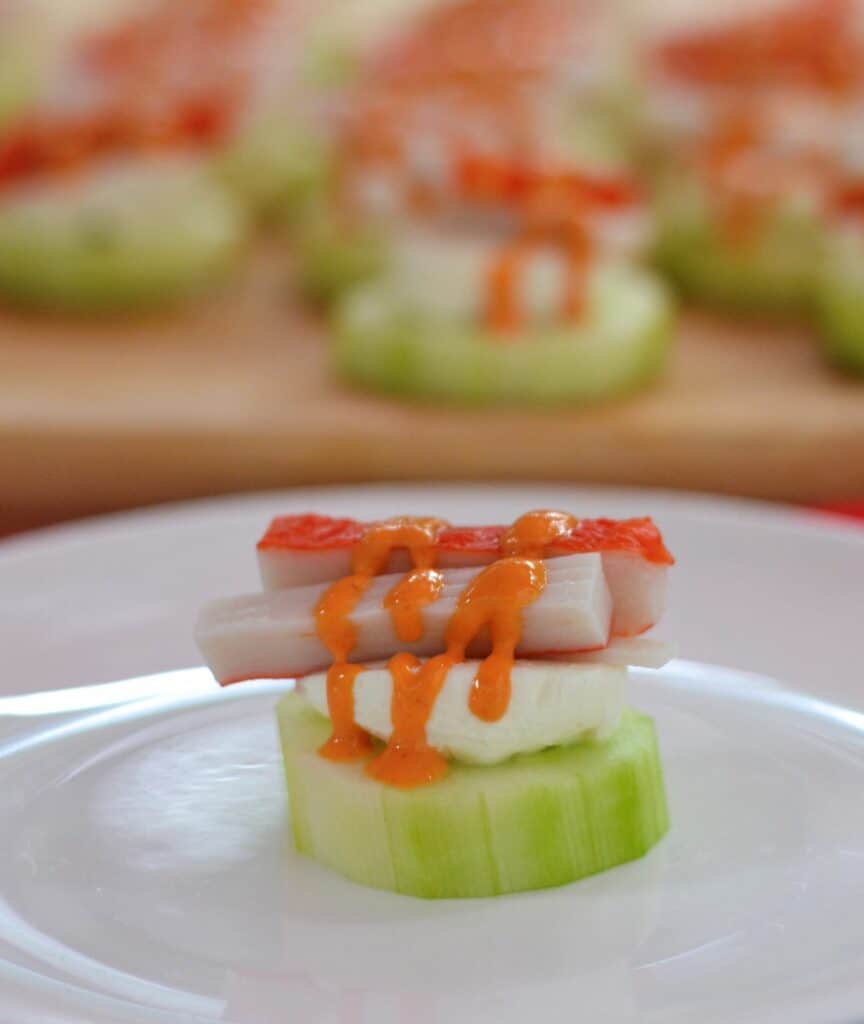
Cucumber slices topped with cream cheese, crab & spicy sriracha mayo. Delicious & super simple to assemble – anyone can make this Cucumber Sushi at home! We’re definitely not all sushi chefs… *Raises hand*. That’s me. I LOVE sushi, but have absolutely none of the skill or talent to make it myself. I respect &…
Easy Pickled Eggs
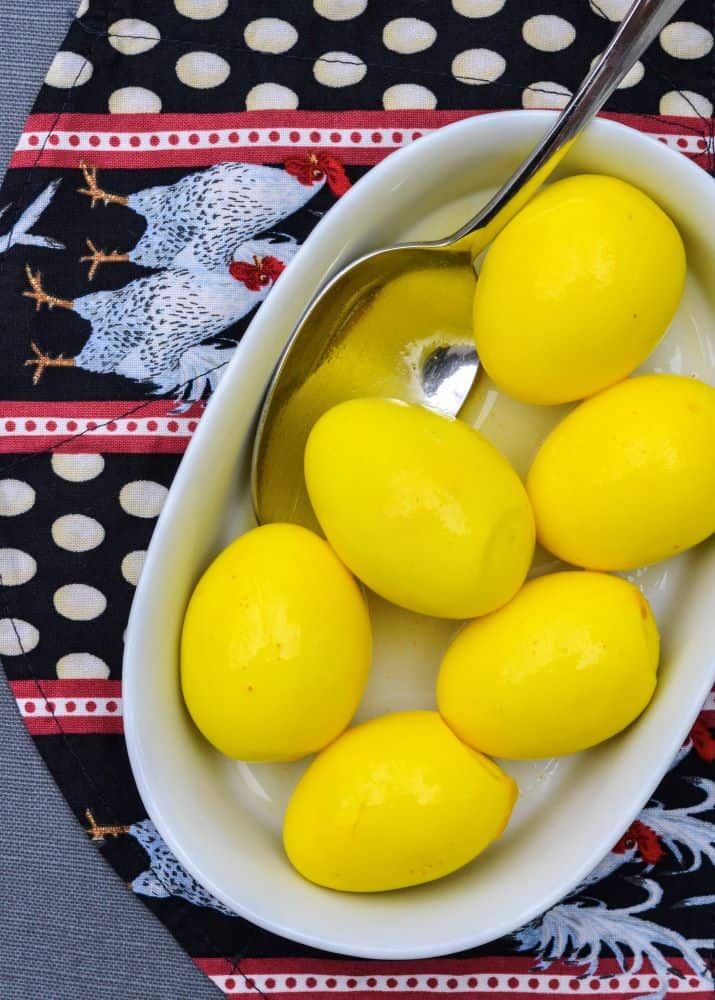
These Easy Pickled Eggs are tangy & delicious! Old fashioned style – Sweet & Sour Pickled Eggs. Perfect for snacking or a light meal! Quick & simple to make and made with pantry staples. This post may contain affiliate links and/or Amazon affiliate links. Thanks for reading & thanks for your support! With Bounty Comes…
Peanut Butter Protein Bars
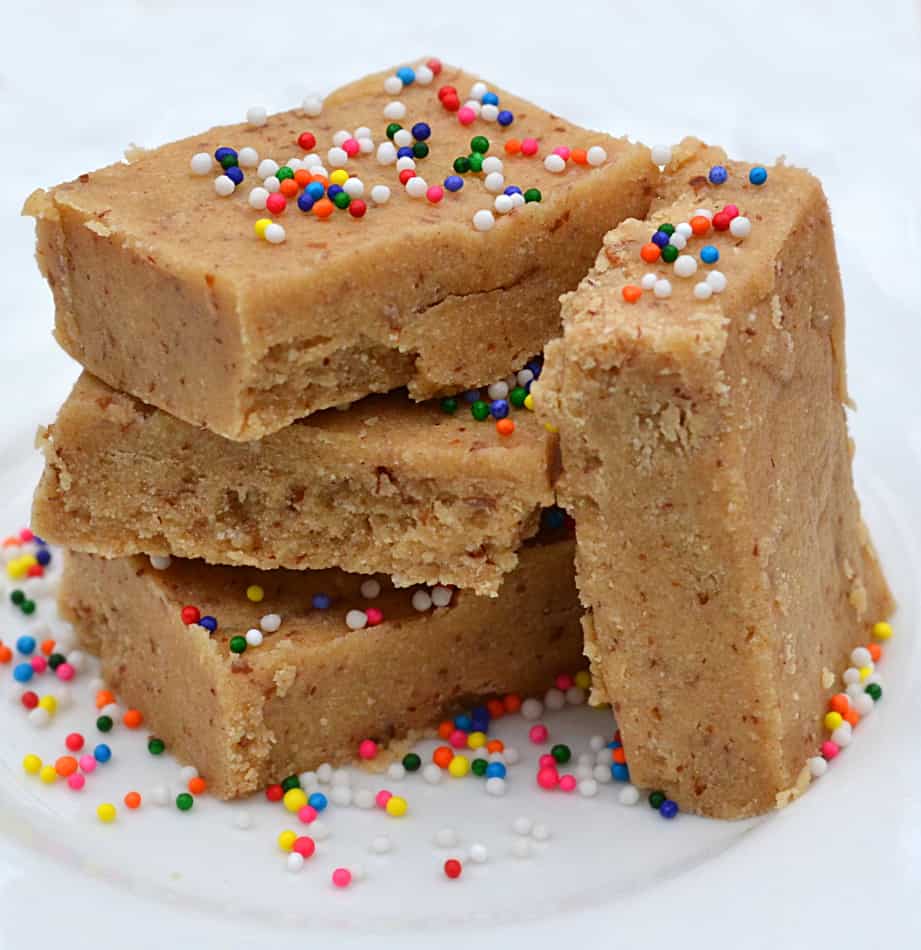
These Low Carb Peanut Butter Protein Bars taste like a healthy Peanut Butter Cheesecake! Quick & simple to make – one bowl, no baking & no food processor! This post contains affiliate links and/or Amazon affiliate links. As always, all opinions are my own. Thanks for visiting & thanks for your support ♥ Low Carb…
Baked Cheddar Cheese & Black Pepper Spread
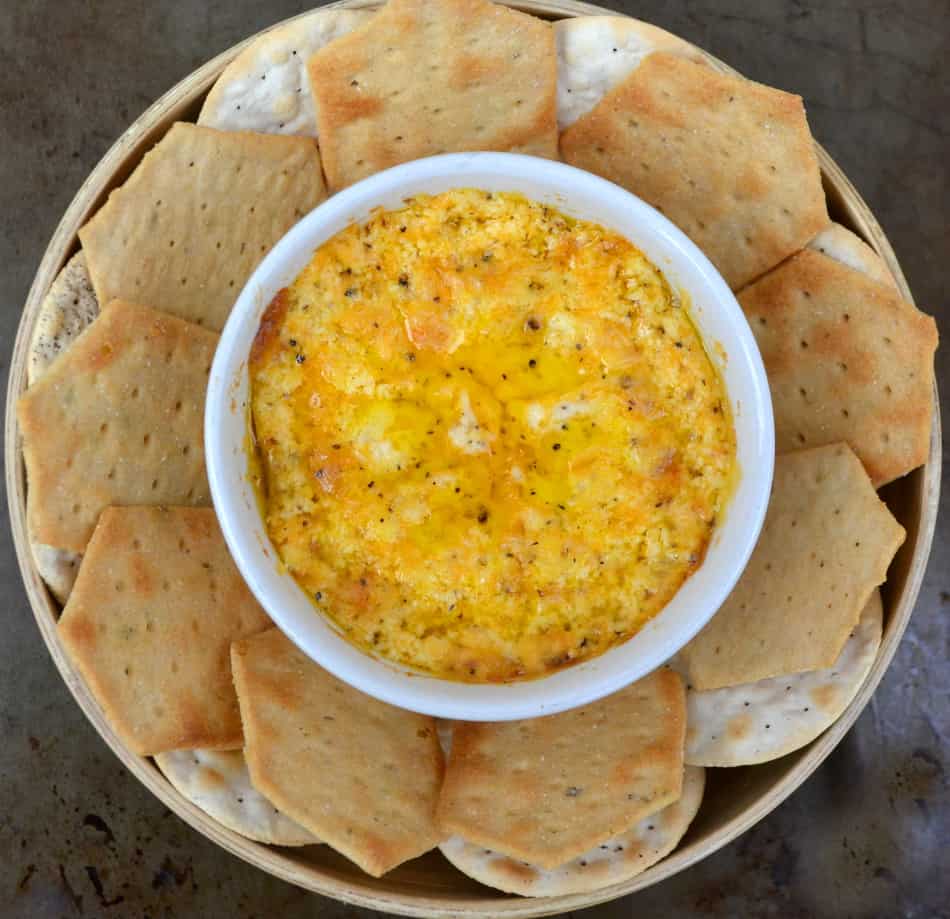
This post was sponsored by Heluva Good! Cheese as part of an Influence Central campaign and all opinions expressed in my post are my own. This quick, simple and delicious Baked Cheddar & Black Pepper Spread takes only four ingredients and just a few minutes to put together! I entertain a lot. Holidays, football games,…
Kalamata Olive Tapenade
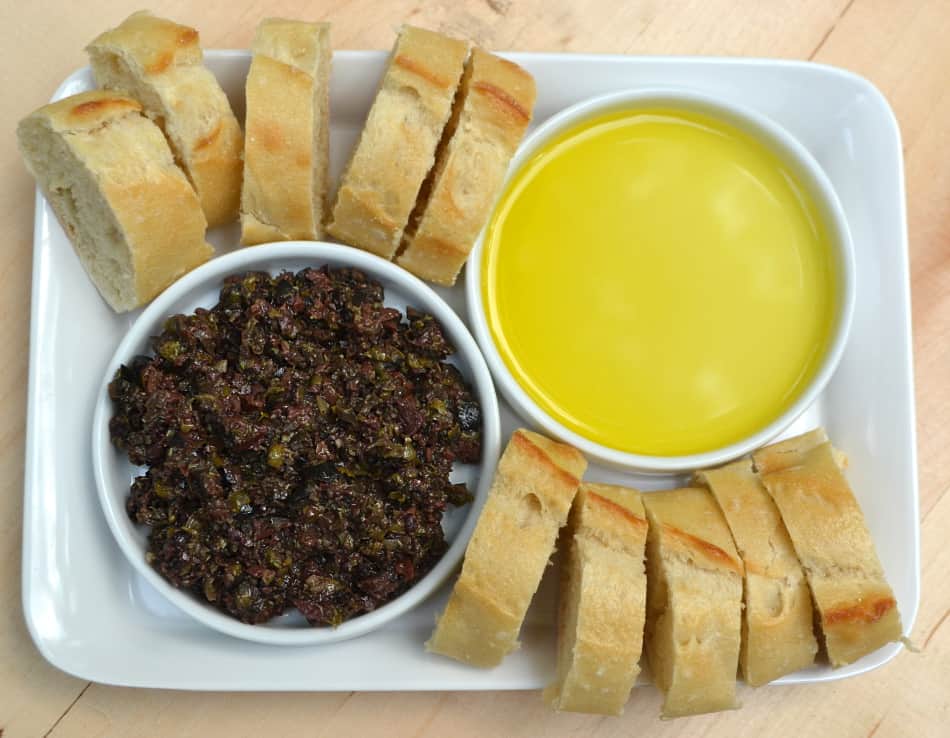
Try this simple & delicious Kalamata Olive Tapenade made with black & kalamata olives, olive oil, capers, anchovies & garlic! This post has been sponsored by Pomora. All content, thoughts & opinions are always my own. This post contains affiliate links and/or Amazon affiliate links. Food Made Simple & Delicious Sometimes simple recipes can be…
Low Carb Chocolate Peanut Butter Protein Bars | Diabetic Friendly
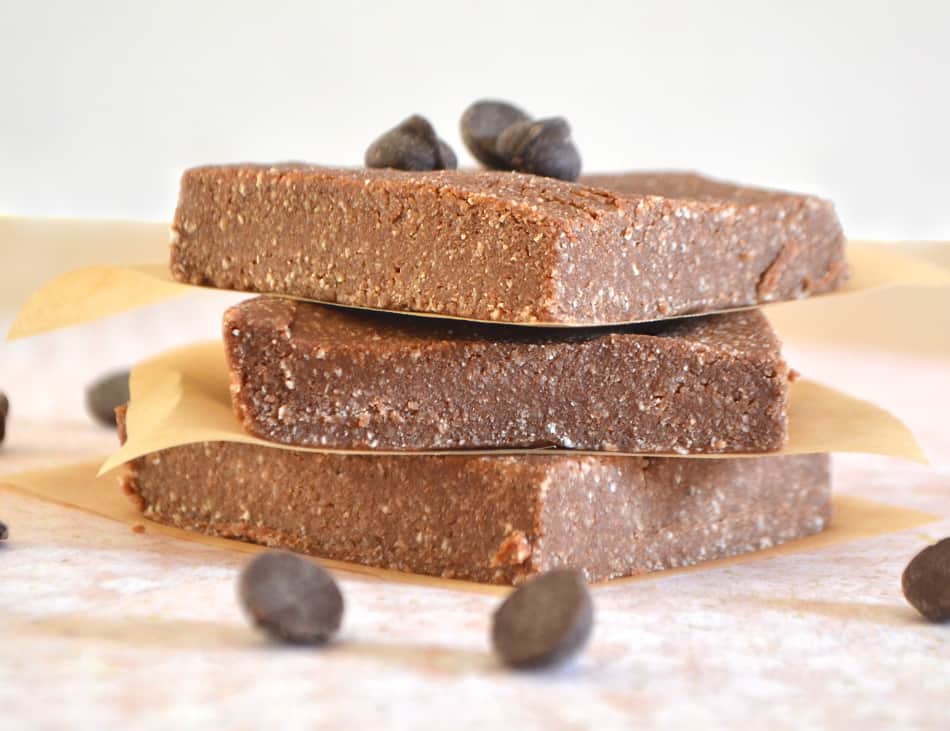
Peanut Butter Low Carb Protein Bars. Coming in at about 10 grams carbs & protein per bar – these are perfect for diabetics & carb counters. First you should know, I definitely haven’t jumped on some New Year’s “low carb” bandwagon. I love all bread & baked carb goodness and that will never, ever,…
Breakfast & Baking With Grape-Nuts®

Today I’m sharing three recipes that will show you how simple it is to add more whole grain goodness to your diet. Oh, and I have money saving coupons to share with you too! Head over to Post® cereals to grab your coupons now! Breakfast has always been and will always be the most important…
Chocolate Chip Granola Scones
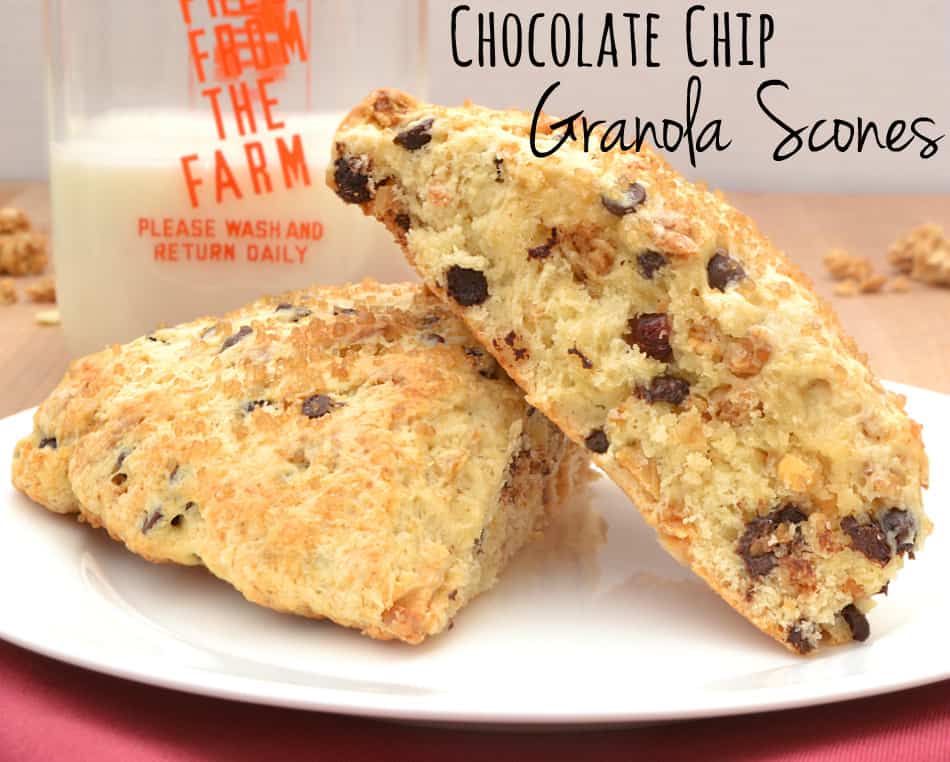
Chocolate Chip Granola Scones are a little crisp on the outside – soft, tender & crumbly in the inside. Perfection ♥ The Marvelous Scone Scones. They’re marvelous for breakfast, brunch or anytime day. Somehow many Americans have missed the memo on scones – muffins tend to be the breakfast bakery item. We can and should…
Smoked Salmon Cucumber Appetizer
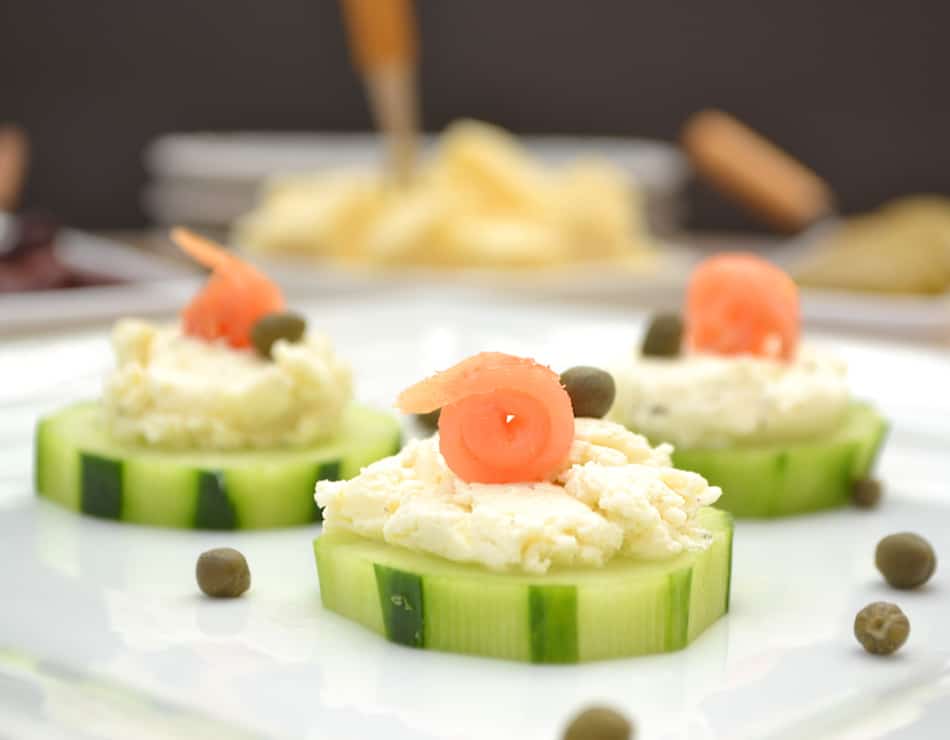
Smoked Salmon Cucumber Appetizer with Boursin Cheese, smoked salmon & capers. So simple to make yet fancy & delicious! Smoked Salmon Cucumber Appetizers – Quick & Easy Hors d’oeuvres We entertain friends & family often – at times unexpected. I always keep an assortment of ingredients on hand to make quick hors d’oeuvres & appetizers….